
From Raw Land to Dream Home: The Step-by-Step Guide to Building Your Custom House
- Fierce Media
- Oct 19, 2025
- 4 min read
Updated: Feb 7

So, you’ve done it! You’ve found the perfect parcel of land—the blank canvas for your dream home. While owning the property is a major milestone, the journey from raw earth to move-in day is complex and requires careful planning.
Building a custom home on your own land is a rewarding process, but it's fundamentally different from buying a pre-existing house or one in a new subdivision. Here is a step-by-step breakdown of the process to help you prepare for the adventure ahead.
Step 1: Secure Your Finances and Team
Before the first shovel hits the dirt, you need your core team and financing in place.
Secure a Construction Loan: Standard mortgages won't work for a custom build. You'll need a construction loan, which typically converts to a traditional mortgage once the home is complete. Lenders will require detailed plans and a firm budget before approval.
Hire Your Team: You'll need an architect or designer to create the plans and a builder/general contractor to manage the construction. This is a critical partnership, so interview several candidates and check their references.
Step 2: Site Analysis and Preparation
Just because you own the land doesn't mean you can build just anything, anywhere. This phase is about understanding the site's limitations and potential.
Conduct a Survey: A professional land survey is required to legally mark property boundaries, identify any easements, and show topographic features.
Perform Soil Testing: A geotechnical engineer will test the soil to determine its composition, stability, and drainage. This directly impacts the foundation design and can prevent costly structural issues later on.
Address Utilities and Access: How will you get electricity, water, gas, and sewer/septic access? Planning for the extension or installation of these utilities and creating an access road or driveway is an essential early step.
Step 3: Design, Permitting, and Budget Finalization
With your site analysis complete, your architect can finalize the blueprints.
Finalize Blueprints: The architect incorporates all site-specific details, soil reports, and your design preferences into a comprehensive set of construction documents.
Obtain Permits: Your builder will submit the detailed plans to the local building department. This process involves reviews for zoning compliance, structural safety, and adherence to local codes. Do not begin construction until all necessary permits are issued. This phase can take several weeks or even months.
Set the Final Budget: With the final plans and contractor bids, you can lock in the final construction cost. It is wise to include a contingency fund (10-15% of the total cost) for unexpected expenses.
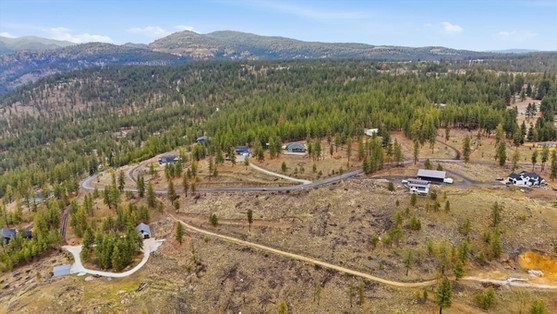
P.S. XX Pine Ridge Way & XX Syringa Way are for sale!


The Construction Phase: From Foundation to Finish
Once the permits are in hand, the real work begins. The construction phase is broken down into four main stages:
1. Site Work and Foundation
Clearing and Grading: The land is cleared of trees or debris, and the area where the home will sit is graded (leveled) for drainage.
Excavation and Footings: Trenches are dug for the foundation, and footings (the base that supports the entire structure) are poured.
Foundation and Slabs: The basement, crawlspace, or concrete slab is formed and poured. Utility runs (plumbing and electrical pipes) are installed before the slab is poured.
2. Framing, Roofing, and Exterior
This is where your home takes its physical shape.
Framing: The skeleton of the house—walls, floors, and roof trusses—is erected.
Roofing: The roof deck is covered with weather-resistant materials, making the structure mostly waterproof.
Windows and Exterior Doors: These are installed to "seal" the house. At this point, the house is considered "dried in."
3. Rough-Ins and Inspections
With the house dried in, the systems that make it functional are installed.
Rough-In Mechanicals: The HVAC (heating, ventilation, and air conditioning) ducts, all electrical wiring, and plumbing lines are run through the walls and ceilings.
Insulation and Drywall: Insulation is installed to meet energy codes, and then drywall is hung, making the interior spaces clearly defined.
Critical Inspections: Before closing up walls, the local authorities will conduct inspections (e.g., plumbing, electrical, framing) to ensure everything is up to code.
4. Finishes and Final Walkthrough
This final stage is where your personal touches come to life.
Interior and Exterior Finishes: Cabinets, flooring, paint, trim work, exterior siding, and landscaping are completed. Light fixtures, appliances, and plumbing fixtures are installed.
Final Inspections and Occupancy Permit: The city or county performs a final comprehensive inspection. Once the house passes, a Certificate of Occupancy (CO) is issued, which is the official permission to move in.
Building a home on your own land is a marathon, not a sprint. It typically takes anywhere from 12 to 18 months from the start of design to the final move-in day. By understanding these key steps and working closely with a professional team, you’ll be well on your way to opening the door to your one-of-a-kind, custom-built dream home!
Real Estate Agent Spokane

It’s a great time to own a home in Spokane! Whether you’re looking for the perfect kitchen, a walkable neighborhood, great restaurant choices, or the best schools, we can help you find just the spot! Contact the Real Estate Agent Spokane today to set up a custom search and learn more about Spokane’s diverse land and housing offerings.
Carrie Meyer is passionate about Spokane, its history, and your future. She specializes in relocation transactions and helps locals find their perfect home. Carrie has over 15 years as a full-time, full-service Realtor and 30 years of experience as a Certified Legal Assistant (paralegal) and is an expert at contracts and negotiations.


What an exciting journey you’re about to embark on! Turning raw land into your dream home sounds like a fulfilling adventure, and I love how this guide breaks down the process into manageable steps. It’s always important to be well-prepared, especially when it comes to planning and building from the ground up. I can't wait to see how your vision transforms into reality!